Laptop Screen Repair – Step-by-Step Guide!
Learn about laptop screen repair, from common issues and costs to DIY steps and prevention tips. Extend your screen’s life and find the best repair option for your needs.
In this guide, we cover everything about laptop screen repair, including diagnosing common screen issues, repair options, and detailed DIY steps. Learn about repair costs, when to choose professional help, and tips to prevent future screen damage. Find the best solution to keep your laptop screen in top condition.
Understanding Common Laptop Screen Issues:

Laptop screens are susceptible to various types of damage. Below are some of the most frequent issues users experience:
Cracked or Shattered Screen:
Accidental impacts, like dropping the laptop or closing it with an object on the keyboard, are common causes of cracked screens. Cracks can vary from minor fractures to extensive shattering that makes the screen unreadable.
Dead or Stuck Pixels:
Dead pixels appear as tiny black or white dots that do not light up with the rest of the screen. These occur due to a manufacturing flaw or pixel burnout over time. Stuck pixels, on the other hand, may display only one color but are usually fixable with special software.
Flickering Screen:
A flickering display can result from multiple issues, such as faulty cables, outdated graphics drivers, or even a failing backlight. This problem can be intermittent, making it challenging to diagnose.
Read More :http://Can Viero One Touch Pair to a Laptop Computer A Step-by-Step Guide
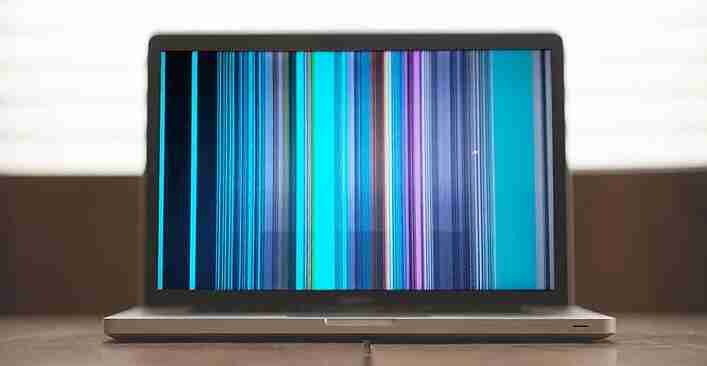
Vertical or Horizontal Lines:
Lines across the screen are typically caused by a malfunctioning display cable, screen damage, or issues with the GPU (Graphics Processing Unit). These lines may appear in specific patterns or colors depending on the nature of the problem.
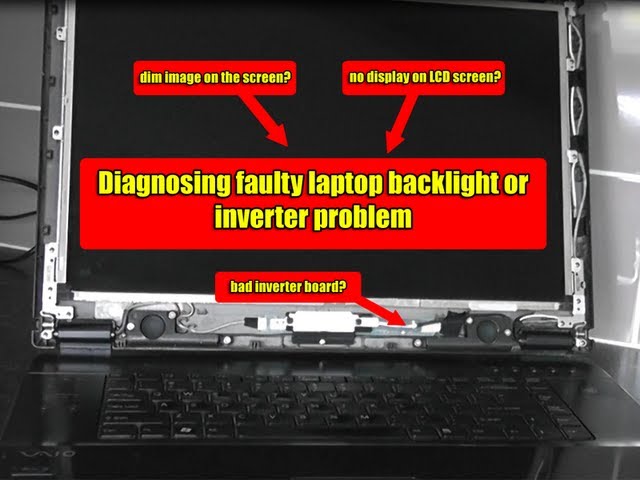
Dim or Black Screen:
If the screen appears dark or black despite the laptop being powered on, it could be a backlight issue or a malfunctioning display inverter. This issue is sometimes mistaken for a hardware problem with the motherboard or GPU.
Identifying the exact nature of the problem is critical to choosing the best repair option.
Diagnosing Screen Problems:

Performing an initial diagnosis can save time and money by helping you decide on the correct repair approach.
Reboot and Test:
A quick restart might resolve minor issues caused by temporary software glitches or driver errors. Restart your laptop and observe the screen for signs of improvement.
Test with an External Monitor:
Connect your laptop to an external monitor using an HDMI, VGA, or USB-C cable. If the external monitor displays correctly, the issue likely lies with your laptop screen rather than the GPU or motherboard.
Run a Dead Pixel Test:
For minor pixel issues, use online tools such as “Dead Pixel Buddy” or “CheckPixels” to assess pixel health. These tools help identify faulty or stuck pixels and, in some cases, may assist in resetting them.
Update Graphics and Display Drivers:
If you notice flickering or color issues, try updating your graphics drivers. Outdated drivers can sometimes cause display problems.
Read More :http://Can You Still Use Laptop on 0 Percent Battery – Key Insights and Tips
Check Display Settings:
Brightness settings, resolution adjustments, and other display options might be worth reviewing. In some cases, misconfigured settings can cause brightness or resolution issues that mimic screen problems.
Laptop Screen Repair Options:
When it comes to repairing your laptop screen, you have three primary choices: DIY repair, professional repair services, and manufacturer or authorized service repairs.
DIY Repair:
Opting to repair your screen on your own can be a cost-effective solution, especially for minor issues or standard screen replacements. DIY repair requires basic tools, replacement parts, and some technical skill. It’s recommended for those who feel comfortable with handling electronic components and can follow detailed tutorials.
Pros:
- Cost-effective for minor repairs and standard replacements.
- Offers flexibility in part selection and customization.
Cons:
- May void warranties on newer laptops.
- Risk of further damage if not done correctly.
Professional Repair Services:

Professional repair shops are an excellent choice if you lack the tools or confidence to replace the screen yourself. Reputable repair centers have experienced technicians who can handle repairs quickly, often using high-quality parts and providing warranties on their work.
Pros:
- Experienced technicians minimize the risk of error.
- Typically faster turnaround times than DIY or manufacturer repairs.
Cons:
- Costs can be higher than DIY.
- Quality varies; it’s essential to choose a reliable repair service.
Manufacturer and Authorized Service Repairs:
If your laptop is under warranty, check if the screen issue qualifies for free repair. Manufacturers provide authorized repairs, which means original parts and certified expertise. However, be prepared for longer wait times, especially if parts are in high demand or if you need to ship the laptop to a repair center.
Pros:
- Warranty protection with high-quality parts and certified repairs.
- Repairs follow strict quality control standards.
Cons:
- Higher costs for out-of-warranty repairs.
- Often slower than local repair shops due to shipping times.
Laptop Screen Repair Costs:
| Repair Option | Cost Range | Details |
| DIY Replacement | $50–$150 (parts only) | Suitable for basic screens; costs increase with touchscreens or high-resolution models. |
| Professional Repair Service | $100–$300 | Varies based on the complexity of the repair and screen type. |
| Manufacturer Repair | $200–$600 | Costs higher for out-of-warranty repairs; sometimes includes shipping fees. |
DIY Laptop Screen Replacement: Step-by-Step Guide:
Replacing a laptop screen yourself can save money and time. Here’s a detailed step-by-step guide for most laptop models:
Tools Needed
- Phillips-head screwdriver
- Plastic prying tool
- Replacement screen (ensure compatibility)
- Anti-static wrist strap (optional but recommended)
Steps
Power Off and Disconnect Power: Turn off the laptop and disconnect the power adapter. Remove the battery if it’s detachable.
Remove the Bezel: Use the prying tool to carefully separate the bezel (frame around the screen). Some laptops have screws securing the bezel, so check if any need to be unscrewed first.
Unscrew the Display Panel: Locate and remove any screws holding the screen in place. Tilt the screen forward to expose the back.
Disconnect the Screen Cable: Gently pull the screen cable from the back of the screen. Be cautious, as this cable is sensitive.
Install the New Screen: Attach the replacement screen by reconnecting the screen cable, then secure it with screws.
Reattach the Bezel: Place the bezel back around the screen and secure it in place. Reinstall any screws if applicable.
Power On and Test: Power on your laptop to verify that the screen replacement was successful.
Read More :http://How Long Will A Video Player Last on a Laptop -Tips and Insights!
Tips for Choosing Quality Replacement Parts:
Check Compatibility: Ensure that the screen matches your laptop model in size, resolution, and connector type.
Buy from Reputable Sources: Choose parts from reliable sources or manufacturers to avoid defective components.
Consider Warranty: Many replacement screens come with a warranty, which can be beneficial in case of malfunctions.
Preventing Future Screen Damage:
Here are some practical tips to protect your laptop screen from future damage:
Use a Laptop Sleeve or Case: Protects the laptop during transport and reduces impact risks.
Avoid Pressure on the Lid: Refrain from placing objects on top of the laptop, even while closed, to avoid screen damage.
Clean with Care: Use a microfiber cloth and gentle cleaning solution to keep the screen free from dust and smudges.
Adjust Brightness Regularly: High brightness levels can reduce backlight lifespan; adjust based on ambient lighting.
FAQ’s
1. Can a laptop screen be repaired if it’s cracked?
Yes, cracked screens are typically repaired by replacing the screen, as DIY repairs for cracks are unreliable.
2. How much does it cost to repair a laptop screen?
Repair costs range from $50 to $600, depending on the screen type, laptop model, and repair method.
3. Is it better to repair or replace an older laptop with a broken screen?
If the laptop is older or has other issues, replacing it might be more cost-effective than screen repair.
4. Can I replace a laptop screen myself?
Yes, with the right tools and guides, DIY screen replacement is possible and can save money.
5. Will a screen repair void my laptop warranty?
DIY or unauthorized repairs may void the warranty, so check with the manufacturer first if under warranty.
Conclusion:
Laptop screen repair is achievable and affordable, whether you opt for DIY or professional service. By understanding the issue, selecting the right repair option, and following best practices, you can extend your laptop’s lifespan and prevent costly repairs in the future.


