How To Use Laptop As Monitor – A Complete Guide!
Use your laptop as a monitor to boost productivity and multitask efficiently. Explore simple methods, including built-in features and software, for a seamless setup.
This article explains how to use your laptop as a monitor with methods like built-in Windows features and third-party software. We provide step-by-step instructions to enhance your workspace and boost productivity. Additionally, you’ll find troubleshooting tips for a smooth dual-screen setup.
Why Use a Laptop as a Monitor?
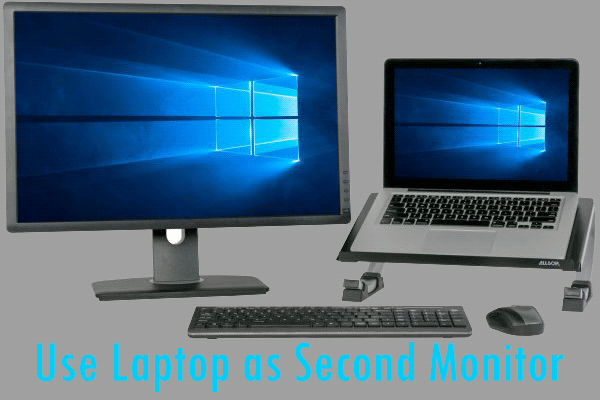
Utilizing a laptop as a monitor offers several compelling benefits:
Increased Productivity:
With a second screen, you can keep multiple applications open simultaneously, enhancing your ability to work efficiently. For instance, you could have a web browser open for research on one screen while writing a report on another.
Cost-Effective Solution:
Instead of spending money on an expensive external monitor, repurposing an old laptop is a budget-friendly way to expand your display capabilities. This approach not only saves you money but also minimizes electronic waste.
Portability:
Laptops are inherently portable. This means you can set up your dual-display system wherever you go, be it in a café, library, or while traveling. You can maintain productivity without being tied to a desk.
Flexibility:
Using a laptop as a monitor provides flexibility in how you work. Whether you need more screen real estate for coding, graphic design, or simply managing various tasks, a secondary screen can help streamline your workflow.
Enhanced Gaming Experience:
For gamers, using a laptop as a monitor can enhance the gaming experience. You can play games on one screen while keeping the chat, maps, or guides open on the other, allowing for a more immersive experience.
Method 1: Using Windows Built-In Features
Overview:
Windows 10 and 11 come with a built-in feature that allows users to extend their display wirelessly to a secondary device. This method is ideal for those who want a quick and easy setup without additional software.
Steps:
- Connect Devices:
- Ensure both your desktop (or main computer) and laptop are connected to the same Wi-Fi network. This is crucial for enabling the wireless display feature.
- Enable Projection on the Laptop:
- On your laptop, navigate to Settings > System > Projecting to this PC.
- Under the “Some Windows and Android devices can project to this PC” section, select Available Everywhere. This setting will allow your laptop to receive a display connection from another device.
- Connect from the Main Device:
- On your primary device (the desktop), press Windows Key + P to open the projection options.
- Select Connect to a wireless display. Your laptop should appear in the list of available devices. Click on your laptop’s name to initiate the connection.
- Select Your Laptop:
- After selecting your laptop, it will prompt you to confirm the connection. Once approved, your laptop will start acting as a secondary display.
Tips for Optimization:
- Adjust Display Settings: After connecting, go to Settings > System > Display to customize the resolution, orientation, and other settings to match your preference.
- Extend vs. Duplicate: Choose the “Extend” option for your display rather than “Duplicate” to maximize your screen space. This allows you to drag applications and windows from one screen to the other seamlessly.
- Keyboard Shortcuts: Familiarize yourself with keyboard shortcuts such as Windows Key + P to quickly switch display modes.
Read More : http://Intel 13th and 14th Gen Issues Laptop – A Detailed Guide for Users
Method 2: Using Third-Party Software
Overview:
For users on different operating systems or those seeking more features than what the built-in options provide, third-party applications can offer a versatile solution. Many of these applications also allow for USB connections, making them more reliable.
Popular Software Options:
- SpaceDesk (Windows):
- SpaceDesk is a popular choice for Windows users, allowing you to connect multiple devices as monitors. It offers a seamless experience with little lag.
- Installation: Download and install SpaceDesk on both the primary and secondary devices. Follow the setup instructions provided in the application..
- Duet Display (Mac and Windows):
- This application works with both Windows and Mac and can even allow iPads to serve as secondary displays. It provides a smooth experience with minimal lag.
- Installation: Download the Duet Display app on both devices. You can connect via USB or Wi-Fi for more reliability.
- Splashtop:
- Splashtop is excellent for remote desktop functionality, allowing you to view and control another computer on your laptop.
- It supports various operating systems, making it versatile for different setups.
- Installation: Install the Splashtop app on both devices and follow the connection prompts.
General Steps for Third-Party Applications:
- Download and Install: Go to the official website of the software and download the installation files for both devices.
- Follow Setup Instructions: Each application has its own setup process, typically involving connecting the devices through Wi-Fi or USB.
- Adjust Settings: Once connected, customize the display settings according to your preferences. Most software options allow you to change the resolution and orientation.
Advantages of Third-Party Applications:
- Enhanced Features: Many applications come with added functionalities, such as touch support, additional resolution options, and remote access capabilities.
- Cross-Platform Compatibility: Some software allows users to connect devices running different operating systems, providing more flexibility in mixed-environment setups.
Method 3: Using HDMI or Other Cables
Overview:
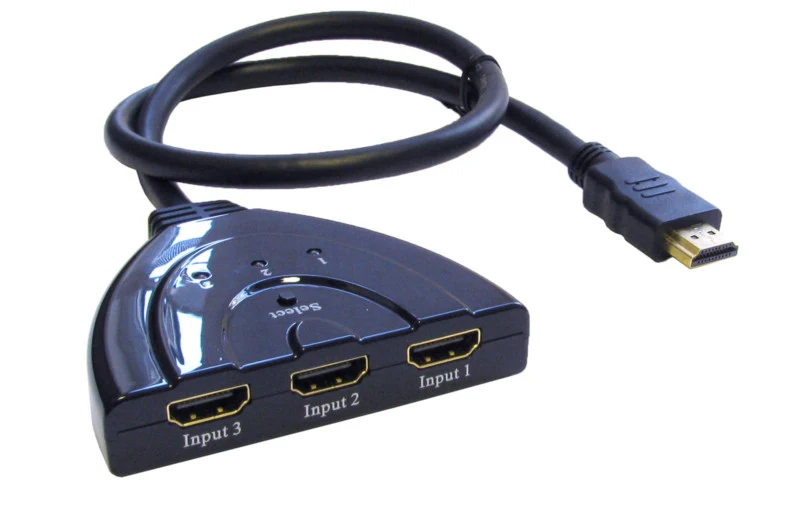
If you have a laptop with an HDMI input (though most laptops only have HDMI output), you can directly connect it to another computer. This method offers a reliable connection without lag, ideal for tasks requiring real-time interactions, such as gaming or video editing.
Steps:
- Check Laptop Ports: Verify if your laptop has an HDMI input. If it has only an HDMI output, this method will not work.
- Connect the Cable:
- Plug one end of the HDMI cable into the HDMI output of your primary device (desktop) and the other end into the HDMI input of your laptop.
- If you are using a different type of cable (such as DisplayPort or USB-C), ensure both devices support that format.
- Change Input Source:
- On your laptop, you may need to change the input source to HDMI. This can usually be done through the settings menu or by using a specific key combination (often Fn + a function key).
- Configure Display Settings:
- Once connected, adjust the display settings on your primary device. Go to Settings > System > Display and select how you want to use the second display (extend or duplicate).
Limitations:
- Hardware Requirements: Most laptops do not have an HDMI input, limiting this method’s applicability. Check your laptop’s specifications before proceeding.
- Cable Length: Depending on your workspace, you may need longer cables, which can sometimes lead to cable management issues.
Troubleshooting Common Issues:
While using your laptop as a monitor can significantly improve your workflow, you may encounter some challenges along the way. Here are some common issues and how to resolve them:
1. Wi-Fi Connectivity Issues:
- Ensure both devices are connected to the same Wi-Fi network. A weak signal can cause lag or disconnections.
- Restart your router if connectivity issues persist.
2. Firewall and Security Settings:
- Your firewall may block connections. Check your firewall settings to ensure that the display application is allowed through.
- Consider temporarily disabling the firewall for testing purposes, but remember to re-enable it afterward.
3. Display Lag:
- If you experience lag while using your laptop as a monitor, try connecting via USB (if the software supports it) instead of Wi-Fi for a more stable connection.
- Ensure both devices have the latest updates installed for optimal performance.
4. Driver Issues:
- Make sure all graphics and network drivers are up to date. Outdated drivers can lead to compatibility issues and affect performance.
5. Resolution and Display Settings:
- If the display doesn’t look right, adjust the resolution settings on both devices. Mismatched resolutions can lead to blurriness or improper scaling.
FAQ’s
1. Can I use my laptop as a monitor for another laptop?
Yes, you can use built-in Windows features or third-party software like SpaceDesk or Duet Display to connect one laptop as a monitor for another.
2. Do I need any special software to use my laptop as a monitor?
While Windows has built-in features for this purpose, using third-party applications like SpaceDesk or Duet Display can provide more functionalities and better performance.
3. Is it possible to connect my laptop using HDMI?
Most laptops only have HDMI output, making it impossible to use them as a monitor via HDMI. However, if your laptop has an HDMI input, you can connect it directly to another device.
4. Will using my laptop as a monitor affect performance?
It may affect performance slightly, especially if using a wireless connection, but using USB connections or reliable third-party applications can minimize lag.
5. What should I do if my laptop doesn’t connect as a monitor?
Ensure both devices are on the same Wi-Fi network, check firewall settings, and update drivers. If using third-party software, verify that both devices have the application installed correctly.
Conclusion:
Using your laptop as a monitor can significantly boost your productivity and help you make the most of your existing devices. Whether you choose to utilize built-in Windows features, explore third-party applications, or opt for a direct cable connection, each method has its advantages.

