How To Fix Msi Laptop Camera – A Step-by-Step Guide
Learn how to fix your MSI laptop camera with simple troubleshooting steps like updating drivers, enabling it in BIOS, and using Windows Troubleshooter.
In this article, we guide you through effective solutions to fix your MSI laptop camera, from checking camera settings and updating drivers to enabling it in BIOS. We also provide tips on using Windows Troubleshooter and performing a system restore. Follow these steps to resolve common camera issues and get your camera working again.
Check Your Camera Settings:

Before diving into more complex solutions, it’s worth checking your laptop’s camera settings to make sure everything is configured correctly.
Steps:
Open the Camera App:
- Press the Windows key and type “Camera” in the search box.
- Open the Camera app to see if it detects your camera.
Check Permissions:
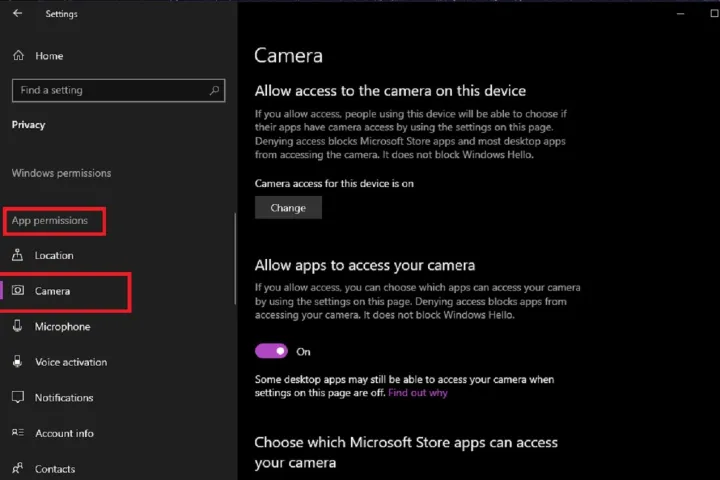
- Go to Settings > Privacy > Camera.
- Ensure that camera access is allowed for apps and that no other apps are blocking the camera.
Test with Another App:
- Sometimes the issue lies with a specific app. Try using the camera with another application like Skype or Zoom to rule out app-specific issues.
Restart Your MSI Laptop:
A simple restart can resolve a wide variety of hardware issues, including problems with the camera. Restarting helps to refresh the system and might restore proper function.
Steps:
- Save your work and close all applications.
- Click on the Start menu, then select Power > Restart.
- Once the laptop reboots, open the Camera app again to check if it works.
Update Camera Drivers:
Outdated or corrupt drivers can cause your MSI laptop camera to stop working. Updating or reinstalling drivers can often resolve the problem.
Steps:
Update the Driver via Device Manager:
- Press the Windows key + X and select Device Manager.
- Expand the “Imaging Devices” section and right-click on your camera.
- Select Update Driver.
- Choose Search automatically for updated driver software. If a newer driver is found, it will be installed.
Download the Latest Driver from MSI Website:
- Visit MSI’s official website and go to the support page for your laptop model.
- Download the latest webcam drivers and install them manually.
Reinstall the Camera Driver:
- In Device Manager, right-click on the camera device and select Uninstall device.
- Restart your laptop, and Windows will automatically reinstall the necessary driver.
Read More:http://How To Use A Laptop As A Monitor – A Comprehensive Guide!
Check the Camera Hardware:
Sometimes the problem may be related to the physical hardware of the camera. If your MSI laptop camera isn’t responding or is physically malfunctioning, here are a few things you can check:
Check for Obstructions:
- Ensure there’s nothing blocking the camera lens, such as a piece of tape or a cover that might have been attached for privacy reasons.
Check the Camera Connection:
- In some cases, the camera may not be properly connected to the motherboard. If you’re comfortable doing so, you can carefully open up your laptop to check if the camera is securely connected. However, if you’re not experienced with hardware, it’s best to take your laptop to a professional.
Enable the Camera in BIOS:
In rare cases, your camera might be disabled in the BIOS settings. Here’s how you can enable it:
Steps:
Enter the BIOS:
- Shut down your MSI laptop.
- Turn it on and immediately press the Delete key (or the appropriate key for your laptop model) to enter the BIOS setup.
Check the Camera Settings:
- In the BIOS menu, navigate to the Advanced or Peripherals tab.
- Look for an option related to the integrated camera (e.g., “Camera” or “Webcam”).
- If the camera is disabled, change the setting to “Enabled.”
Save and Exit:
- Press F10 to save the changes and exit BIOS. Your laptop will restart, and the camera should be enabled.
Check for System Updates:

Windows updates often include bug fixes that could resolve camera-related issues. Keeping your system up-to-date can help avoid software-related camera problems.
Steps:
Check for Updates:
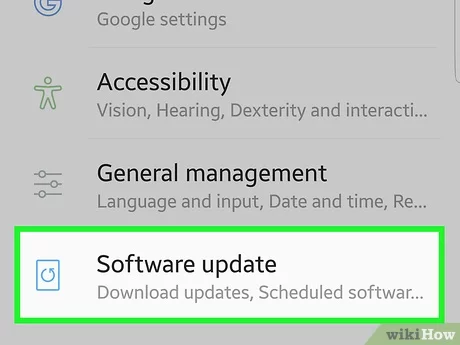
- Open Settings and go to Update & Security.
- Click on Check for updates and install any available updates.
Update MSI Utilities:
- MSI provides utility software for its laptops that can help manage hardware and drivers. Ensure that you have the latest version of MSI’s system tools, which could include updates for camera drivers or related software.
Use Windows Troubleshooter:
If none of the above steps work, Windows has a built-in troubleshooter designed to diagnose and fix common hardware issues, including problems with the camera.
Steps:
Open the Troubleshooter:
- Go to Settings > Update & Security > Troubleshoot.
- Click on Additional troubleshooters.
Run the Camera Troubleshooter:
- Find and select the Camera troubleshooter.
- Follow the on-screen instructions to allow Windows to detect and fix any issues with the camera.
Check for Malware or Conflicting Software:
Malware or conflicting software can sometimes interfere with the proper functioning of your camera. Make sure your laptop is free from malicious programs and check if other software might be preventing the camera from working.
Steps:
Run a Virus Scan:
- Open Windows Defender or your antivirus software and perform a full system scan.
Check for Software Conflicts:
- Uninstall any recently installed software or apps that might be causing a conflict with the camera. For instance, security software or certain apps might prevent the camera from operating properly.
Read More:http://How To Stop Screen From Sleeping When Close Toshiuba Laptop – A Complete Guide
Perform a System Restore:
If the camera was working fine previously and suddenly stopped, performing a system restore to a previous point when the camera was functional might resolve the issue.
Steps:
Open System Restore:
- Press Windows key + R to open the Run dialog, then type rstrui and press Enter.
Select a Restore Point:
- Follow the on-screen instructions to select a restore point from a date when the camera was working.
- After the restore process is complete, check if the camera is functioning properly.
Contact MSI Support:
If none of the above solutions work, it may be a hardware issue that requires professional repair. Contact MSI customer support for assistance or visit an authorized service center for further diagnosis.
FAQ’s
1. Why is my MSI laptop camera not working?
The camera may be disabled, outdated drivers, or conflicting software could be causing the issue.
2. How do I update my MSI laptop camera driver?
Go to Device Manager, locate your camera under Imaging Devices, right-click it, and select “Update Driver.”
3. How do I enable my MSI laptop camera in BIOS?
Restart your laptop, enter BIOS by pressing Delete, find camera settings in the Advanced tab, and enable it.
4. Can I fix my camera using Windows Troubleshooter?
Yes, use the Windows Troubleshooter under Settings > Update & Security to detect and resolve camera issues.
5. What should I do if the camera is still not working after updates?
Try performing a system restore or contact MSI support for further assistance if the problem persists.
Conclusion:
There’s no need to panic if your MSI laptop camera stops working. By following the steps outlined above, you can troubleshoot the issue and restore your camera’s functionality. Start with basic checks like camera settings and permissions, and then move on to more in-depth solutions like updating drivers or checking the hardware. If all else fails, MSI’s customer support is always there to help you resolve any hardware issues.


