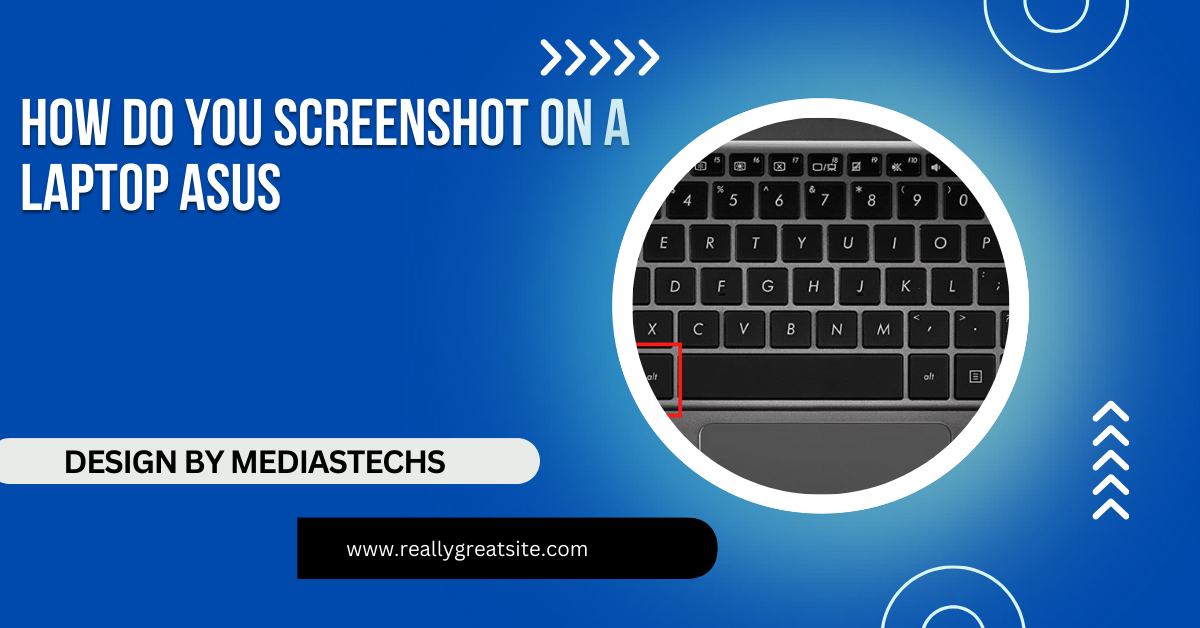
How Do You Screenshot On A Laptop Asus – Tips and Techniques!
Learn how to screenshot on your ASUS laptop using methods like the PrtSc key and Snipping Tool. Capture your screen effortlessly with this comprehensive guide!
This article provides a detailed guide on taking screenshots on your ASUS laptop using methods like the PrtSc key and Snipping Tool. You’ll find step-by-step instructions for capturing full screens, active windows, and more. Whether you’re a beginner or advanced user, this guide makes capturing your screen easy!
Why You May Need Screenshots:
Before diving into the methods, it’s essential to understand why screenshots are useful. Here are some common scenarios where you might need them:
- Sharing Information: Capture content such as error messages, social media posts, or web pages to share with others.
- Creating Guides or Tutorials: Screenshots are essential when creating how-to articles, presentations, or tech support guides.
- Saving Memories or Reference Material: Capture important data like flight bookings, receipts, or online transactions for future reference.
- Collaborating with Teams: Sharing visuals in project workspaces or during team collaborations helps clarify tasks.
Knowing the different methods for taking screenshots can make your daily laptop experience much smoother, whether you need a quick image or more complex capture.
Using the Print Screen (PrtSc) Key for Quick Full-Screen Captures:
The Print Screen (PrtSc) key is the quickest and most straightforward method to capture the entire screen. Every ASUS laptop, regardless of the model, comes equipped with this feature. It allows you to quickly copy the screen image to your clipboard, and from there, you can paste it into an application like Paint, Microsoft Word, or an email.
How to Use the PrtSc Key:
- Press the PrtSc Key: Simply press the PrtSc key on your keyboard. This copies the entire screen to the clipboard.
- Open an Application to Paste: Open Paint, Microsoft Word, or any other application where you want to save the screenshot.
- Paste and Save: Press Ctrl + V to paste the image into the application, and then save it in the desired format (PNG, JPG, etc.).
For those who need quick and basic screenshots, this method is ideal. However, since the screenshot is only copied to the clipboard, you will need to manually paste and save it every time.
Capturing Only the Active Window with Alt + PrtSc:
If you don’t need the entire screen and only want to capture the active window, ASUS laptops allow you to use Alt + PrtSc for this purpose. This method is ideal when you are working with multiple windows and only want to save one.
Steps to Capture the Active Window:
- Click on the window you want to capture to make it active.
- Press Alt + PrtSc at the same time. This will copy only the active window to your clipboard.
- Just like with the full screen method, open an application like Paint or Word and paste the screenshot using Ctrl + V. You can then save the image to your preferred location.
Saving Screenshots Automatically with Windows + PrtSc:
Sometimes, it’s easier to have your screenshots automatically saved rather than manually pasting them into an application. Windows allows you to do this by using Windows Key + PrtSc, which takes a screenshot of your entire screen and saves it directly to your Pictures folder.
Steps to Save Screenshots Automatically:
- Press Windows Key + PrtSc simultaneously.
- The screen will dim momentarily to indicate that a screenshot has been taken.
- The image will be saved automatically in your Screenshots folder, located inside the Pictures directory.
This method is convenient for those who take frequent screenshots, as it eliminates the need to paste and save manually.
Using the Snipping Tool for Precision Captures:
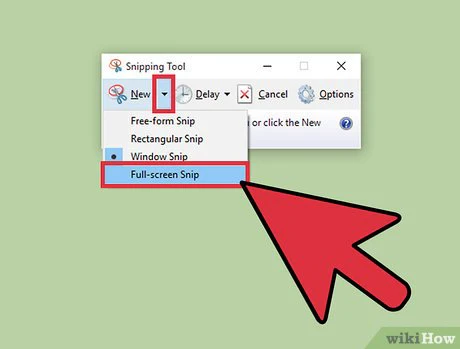
The Snipping Tool is a built-in utility in Windows that allows for more precision when capturing screenshots. It’s ideal for users who want more control over what part of the screen to capture, especially when working on detailed projects.
How to Use the Snipping Tool:
- Open the Snipping Tool by typing “Snipping Tool” into the Windows search bar and selecting the app.
- Once open, click New to start a new capture. You can choose from several snip modes:
- Free-form Snip: Draw a custom shape around the area you want to capture.
- Rectangular Snip: Select a rectangular portion of the screen.
- Window Snip: Capture a specific window on your screen.
- Full-Screen Snip: Capture the entire screen.
- After capturing, the Snipping Tool window will display your screenshot. From here, you can annotate, save, or copy the screenshot to the clipboard.
Using Snip & Sketch for Enhanced Functionality:
For users looking for even more features, Windows introduced the Snip & Sketch tool. This is an updated version of the Snipping Tool with added functionality, such as the ability to annotate images, share directly from the app, and more snip types.
How to Use Snip & Sketch:
- Press Windows Key + Shift + S to open Snip & Sketch. Your screen will dim slightly, and a toolbar will appear at the top of the screen.
- Select the type of snip you want (Rectangular, Freeform, Window, or Full-Screen).
- Once you make your selection, the screenshot is copied to your clipboard. A notification will pop up, allowing you to click on it and open the Snip & Sketch app for editing, saving, or sharing.
Read More : http://How Long Will A Video Player Last on a Laptop -Tips and Insights!
Third-Party Screenshot Tools for ASUS Laptops:
Sometimes, the built-in tools in Windows may not be enough, especially if you need advanced features like screen recording, timed captures, or cloud integration. There are several third-party apps available that can extend the functionality of your ASUS laptop’s screenshot capabilities.
Some popular third-party tools include:
- Lightshot: This is a lightweight and easy-to-use tool that allows for quick captures, annotations, and instant uploads to the cloud.
- Greenshot: A more advanced tool that offers a range of capture modes and basic image editing features.
- ShareX: Ideal for power users, ShareX offers a variety of capture modes, screen recording, and powerful editing tools.
Using Windows Game Bar for Gamers and Screen Recording:
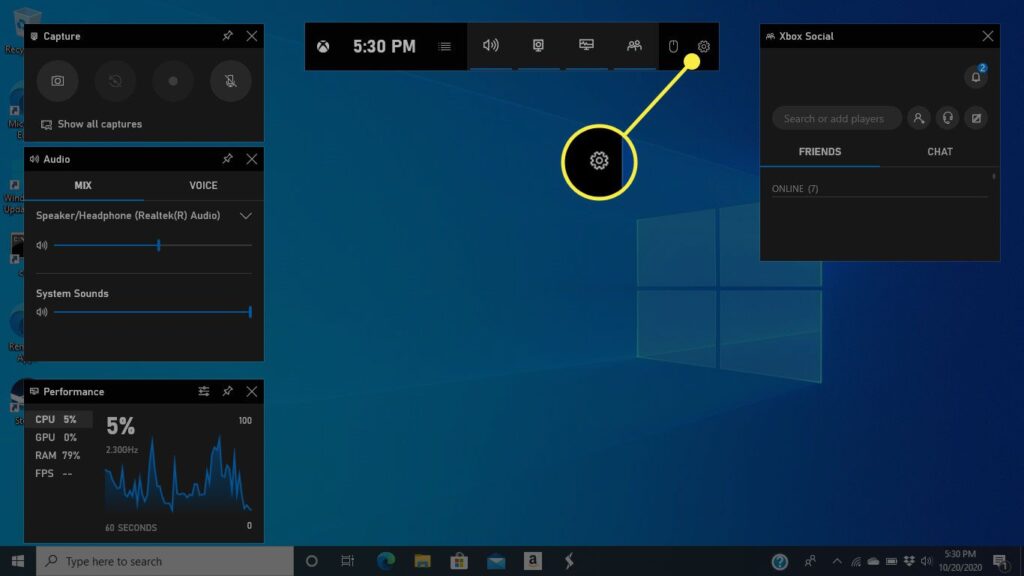
If you’re into gaming or need to record your screen in real-time, Windows Game Bar provides built-in tools to capture screenshots or record videos without needing third-party software.
How to Use the Windows Game Bar:
- Press Windows Key + G to open the Game Bar.
- Click the Camera icon to take a screenshot, or press Windows Key + Alt + PrtSc to capture an image directly.
- All screenshots taken with the Game Bar will be saved in the Captures folder within your Videos directory.
This method is perfect for gamers or anyone who wants to record a series of actions on their screen, including video.
Synchronize Your Screenshots with OneDrive:
OneDrive allows you to automatically sync your screenshots to the cloud, so you can access them from any device. This is a great option for those who need to access their screenshots on the go or want to ensure their screenshots are backed up.
How to Set Up OneDrive for Screenshot Syncing:
- Right-click on the OneDrive icon in your taskbar and go to Settings.
- Under the Backup tab, check the option labeled Automatically save screenshots I capture to OneDrive.
- From now on, any screenshot you take using the PrtSc key will be saved to your OneDrive account, making it accessible across all your devices.
FAQ’s
- How do I take a screenshot of just one window on my ASUS laptop?
Press Alt + PrtSc to capture the active window, then paste it into an application like Paint to save it.
- Where are my screenshots saved on an ASUS laptop?
If you use Windows Key + PrtSc, your screenshots are automatically saved in the Screenshots folder within Pictures.
- Can I edit my screenshots after taking them?
Yes, you can use built-in tools like Snipping Tool or Snip & Sketch to annotate and edit your screenshots.
- Is there a way to automatically save screenshots to OneDrive?
Yes, you can enable the option in OneDrive settings to automatically save screenshots to your OneDrive account.
- What if the PrtSc key is not working on my ASUS laptop?
Try using the Fn + PrtSc combination, or ensure that your keyboard drivers are up to date.
Conclusion: The Best Method for Your Needs
ASUS laptops offer a variety of ways to capture screenshots, from basic keyboard shortcuts to more advanced tools for editing and sharing. Depending on your needs, you can choose between quick methods like the PrtSc key or use more advanced tools like Snip & Sketch or third-party apps.

