Screenshot On Hp Laptop – A Comprehensive Guide!
Learn how to take screenshots on your HP laptop using the Print Screen key and Snipping Tool. This guide covers everything you need for effective screen capturing.
In this article, we explore various methods for taking screenshots on your HP laptop, including the Print Screen key, Snipping Tool, and Snip & Sketch. Each method is explained step-by-step to help you easily capture your screen. Additionally, we provide troubleshooting tips and best practices for effective screen capturing.
Why Take Screenshots?
Screenshots can be invaluable for various reasons:
- Documenting Information: Save important data such as recipes, instructions, or important emails without needing to write them down.
- Sharing Content: Easily share visuals with colleagues, friends, or on social media platforms.
- Troubleshooting: Capture error messages or specific system settings for tech support or forums.
- Creating Tutorials: Use screenshots to create step-by-step guides for software applications or processes.
- Preserving Evidence: Take screenshots of online transactions, messages, or content for future reference.
Different Methods to Take Screenshots on an HP Laptop:
Method 1: Using the Print Screen Key
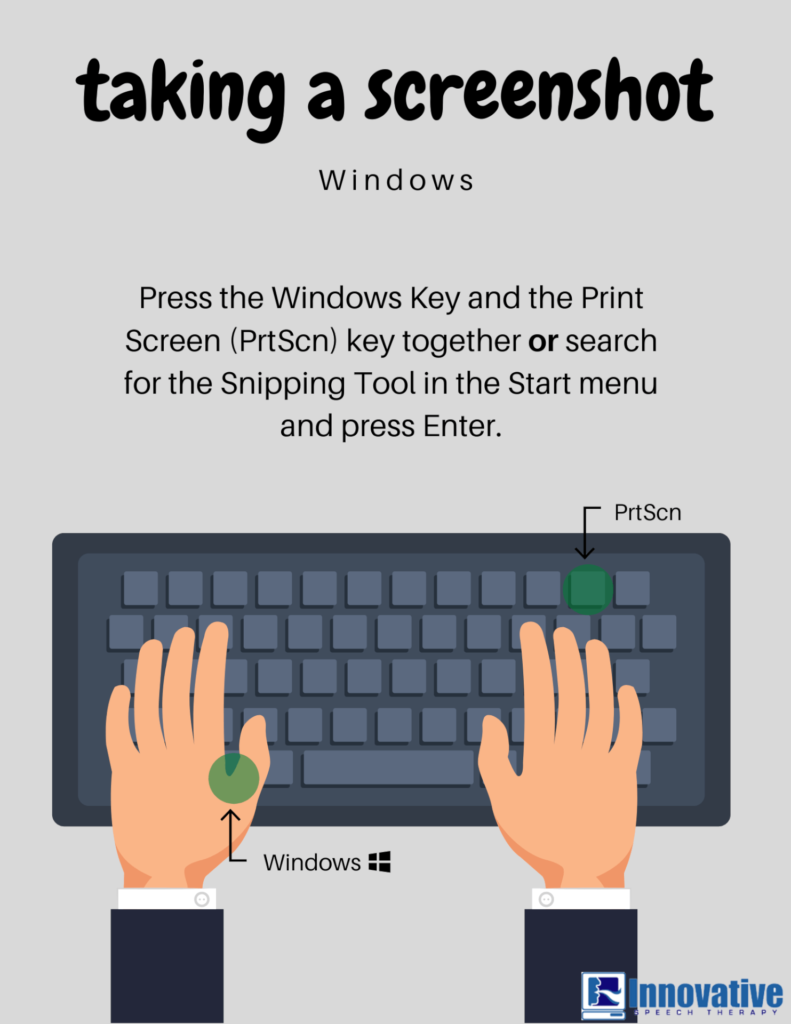
The Print Screen (PrtScn) key is your primary tool for capturing screenshots. Here are different ways to use it:
Full Screen Screenshot:
Press the PrtScn key. This captures the entire screen and saves it to your clipboard.
Open an image editing software like Paint, or a document application like Word.
Paste the screenshot by pressing Ctrl + V.
Save the file by clicking on File > Save As, then choose your desired file format (e.g., PNG, JPEG) and location.
Read More :http://Macbook Pro 15 Inch – Everything You Need to Know!
Active Window Screenshot:
Click on the window you want to capture to make it active.
Press Alt + PrtScn. This captures only the active window.
Paste it into an editing or document application as described above.
Specific Area Screenshot:
Press Windows + Shift + S to open the Snipping Tool.
Select the area you want to capture by clicking and dragging your cursor. The screen will dim, and you can select any rectangular area.
The screenshot will be copied to your clipboard, which you can paste into an application like Paint or Word.
Method 2: Using the Snipping Tool
Windows includes a built-in tool called Snipping Tool, perfect for more customizable screenshots. This tool allows you to take screenshots in various formats and provides some basic editing features.
Open Snipping Tool:
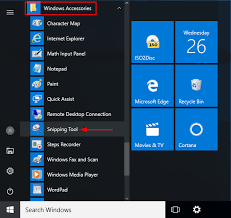
Type “Snipping Tool” in the search bar and select it. You can also find it in the Start menu under Windows Accessories.
Choose the Snip Type:
Click on New and choose from the following options:
- Rectangular Snip: Draw a rectangle around the area you wish to capture.
- Freeform Snip: Draw a custom shape to capture a specific area.
- Window Snip: Capture a specific window you have open.
- Full-Screen Snip: Capture the entire screen.
Capture and Save:
After taking a screenshot, you can annotate it with a pen tool, highlighter, or eraser. To save the screenshot, click on the File menu, select Save As, choose your preferred file format, and save it to your desired location.
Method 3: Using Windows Snipping Tool or Snip & Sketch (Windows 10 and 11)
In addition to the classic Snipping Tool, Windows 10 and 11 offer Snip & Sketch for enhanced functionality and easier access to captured images.
Open Snip & Sketch:
Press Windows + Shift + S to access the snipping options. The screen will dim, and a toolbar will appear at the top of the screen.
Select the Capture Type:
Read More :http://How To Clean Laptop Screen – A Comprehensive Guide!
Choose your preferred method from the toolbar:
- Rectangular Snip: Draw a rectangle around the area.
- Freeform Snip: Draw any shape around the area.
- Window Snip: Click on an open window to capture.
- Full-Screen Snip: Capture the entire screen.
Edit and Save:
After capturing, the screenshot will appear in a notification. Click on it to open in the Snip & Sketch app, where you can annotate or edit it using various tools, such as cropping, highlighting, or adding text. When finished, click on the disk icon or File > Save As to save the image.
Method 4: Using Third-Party Software
If you need advanced features like scrolling screenshots or video capture, consider third-party applications. These tools can provide additional functionalities that the built-in Windows tools may not have.
- Greenshot: A lightweight tool that allows for easy screenshot capture with customizable options, including hotkeys and direct uploading to various image-sharing sites.
- Lightshot: An easy-to-use screenshot tool that allows you to capture any part of your screen and provides options for editing and sharing directly on social media or via a URL link.
- Snagit: A powerful tool designed for creating detailed tutorials and presentations. It offers extensive editing features, allowing you to capture video and images, annotate, and save in various formats.
Tips for Effective Screenshots:
- Check Your Settings: Ensure your screen resolution is set to the highest quality for clearer images. Higher resolution captures will be more legible and professional-looking.
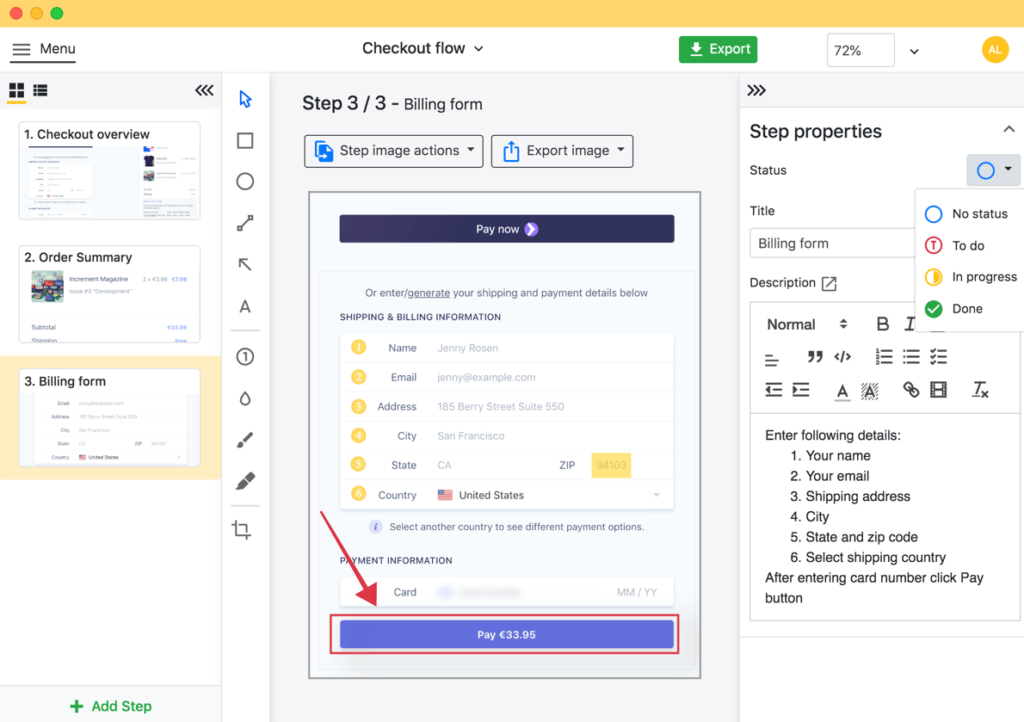
- Use Annotations Wisely: When you annotate your screenshots, use colors and highlights to draw attention to important details, but avoid cluttering the image, which can distract from the main message.
- Organize Your Files: Create a dedicated folder for screenshots on your computer to keep them organized. Use a consistent naming convention to make it easy to locate specific images later.
- Consider File Formats: Save your screenshots in a format that suits your needs. For example, use PNG for images with text and JPEG for photographs to balance quality and file size.
- Edit Before Sharing: Take a moment to edit and adjust your screenshots before sharing them. Cropping out unnecessary parts and improving brightness or contrast can make a big difference in clarity.
Common Issues and Troubleshooting:
While taking screenshots is generally straightforward, you may encounter a few common issues. Here are some troubleshooting tips:
- Screenshot Not Saving: If your screenshots are not saving, check that you are following the correct procedure for pasting and saving. Ensure that the application you are using supports the image format you are trying to save.
- Print Screen Key Not Working: If the PrtScn key does not respond, ensure that your keyboard is functioning correctly. Try using an external keyboard if possible. Additionally, check for any keyboard shortcuts that may interfere with the PrtScn functionality.
- Snipping Tool Not Opening: If the Snipping Tool is not launching, ensure that it is installed on your device. You can reinstall or update it via the Microsoft Store. Alternatively, use the Snip & Sketch feature, which is available on newer Windows versions.
- Missing Screenshots: If you cannot find your screenshots after capturing them, check the default save location, which is typically the Pictures folder under a subfolder named Screenshots. For Snipping Tool or Snip & Sketch, they may need to be saved manually.
FAQ’s
1. How do I take a full-screen screenshot on my HP laptop?
Press the PrtScn key to capture the entire screen, then paste it into an application like Paint or Word to save.
2. Can I take a screenshot of just one window?
Yes, press Alt + PrtScn to capture the active window only, and paste it into an editing program.
3. What is the Snipping Tool, and how do I use it?
The Snipping Tool is a built-in Windows app that allows you to take customizable screenshots. Open it, choose your snip type, and select the area you want to capture.
4. How do I access Snip & Sketch on my HP laptop?
Press Windows + Shift + S to activate Snip & Sketch, allowing you to capture screenshots in various formats.
5. What if my screenshots are not saving?
Ensure you paste the screenshot into an application after capturing it and save it manually. Check the default save location, typically the Pictures > Screenshots folder.
Conclusion:
Taking screenshots on your HP laptop is a straightforward process with multiple methods to suit your needs. Whether you use the Print Screen key, the Snipping Tool, or third-party software, mastering these techniques will help you enhance your workflow and improve communication. Screenshots are not just a simple utility; they can significantly aid in documenting information, creating tutorials, and sharing knowledge.

